

I recently decided to test the use of a Custom Script Extension, as I wanted to deploy a VM with client software installed. I created a Powershell script that downloaded, extracted and installed the MSI tool Orca. If I could get this to deploy and run successfully it would give me a basis to install any software I needed, plus perform any other configuration I might need.
I added lots of error logging to the script so that I would have plenty of information when it came to troubleshooting. The script I used is located here.
Create ARM Template
I took an existing ARM template that I used to create a Windows 10 VM, renamed it and added the Custom Script Extension code. The template is here and the parameter file I used is here.
The Custom Script Extension code itself is shown here.
To deploy the template I used the following Powershell commands (after installing the Az module).
Connect-AzAccount
New-AzResourceGroupDeployment -Name TestDeployment -ResourceGroupName HiggCon -TemplateFile C:\Dev\VM\VMcse.template.json -TemplateParameterFile C:\Dev\VM\VM.parameters.json
And that is where the problems started…
There is a part of me that always hopes that something like this will work first time, but I have to be honest, it hardly ever does! So the error I got back is below.

I looked back through my Custom Script Extension code (which I had got, and edited, from the Microsoft documentation), and found the following line that I hadn’t noticed.
"name": "virtualMachineName/config-app",Hmm, that didn’t look right, so I changed it to this.
"name": "[Concat(parameters('virtualMachineName'),'/config-app')]",Hurrah, the deployment was then successful…but.
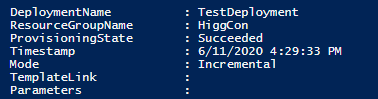
Looking in Azure, I could see that the VM appeared to have been created successfully. Unfortunately, after logging into the VM, Orca wasn’t installed.
I looked in the Eventlog. There were no entries from my script so it looked like the script hadn’t run, but why?
First I looked in the C:\WindowsAzure\Logs\WaAppAgent.Log file. It looked like some Custom ScriptExtensions had run successfully, but they looked Azure specific, with no hint that my script had run. After some digging I managed to find the VMConfig.ps1 file, that was my script, in C:\Packages\Plugins\Microsoft.Compute.CustomScriptExtension\1.10.8\Downloads\0. So that showed that the script had been copied down correctly. I tried running the script manually…and got the “Running Scripts is disabled” message. Doh!
I changed my command to execute to the following, deleted the VM and reran the deployment.
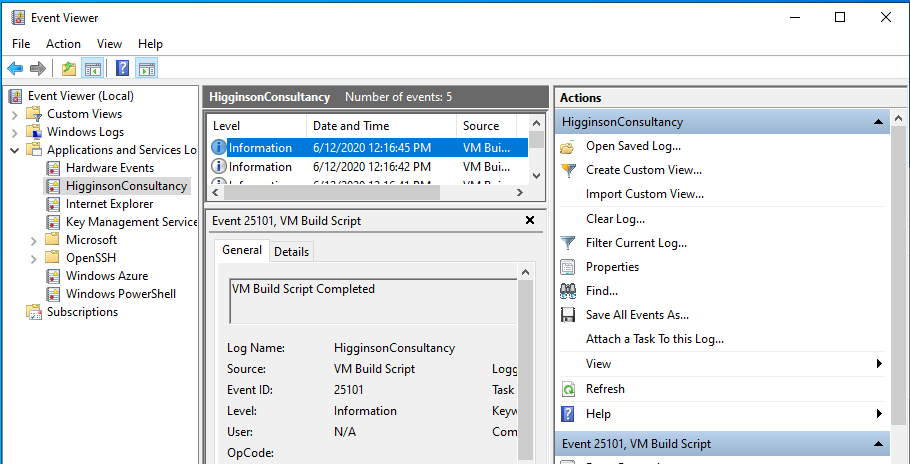
"commandToExecute": "powershell -ExecutionPolicy Unrestricted -File VMConfig.ps1"Success! My Deployment worked AND my script worked. Orca was installed successfully. My script had also written successfully to the Event Viewer.
I looked in C:\WindowsAzure\Logs\WaAppAgent.Log and found these entries near the bottom.

Its not exactly clear, but I think it is related to my script as it wasn’t there previously. The middle line includes this “ExtensionName: ”’ seqNo ‘0’ reached terminal state”. My script was downloaded to a directory named 0, so my thinking is that they are related. The end of the last line stating “completed with status: RunToCompletion” sounds right too. Unfortunately it is difficult to know definitely.
Summary
So what have we learnt? Well first of all, I think that when writing a script to deploy using Custom Script Extension, it makes a lot of sense to include as much logging as possible, and to test if fully before trying to deploy, as it will be difficult to determine what is wrong otherwise.
The deployment can really be split into two sections, Deployment and Execution.
Deployment
It is easy to misconfigure the ARM template, as I found to my cost. I used Visual Studio Code to edit the template as it supports ARM templates and identifies error syntax. Make sure all errors are resolved before trying to deploy. The “New-AzResourceGroupDeployment” Powershell cmdlet will tell you if the deployment was successful or not. The error messages aren’t always easy to interpret though.
Execution
Once successfully deployed, if you don’t get the result you are expecting check the
C:\Packages\Plugins\Microsoft.Compute.CustomScriptExtension\1.10.8\Downloads
directory for a subdirectory holding your script. That way you know that it is actually there. Then trying running the script and see what error messages you get.
I also looked in
C:\Packages\Plugins\Microsoft.Compute.CustomScriptExtension\1.10.8\Status
and found a “0.status” file that gave me a little more information on my script, and a success status code.
In
C:\Packages\Plugins\Microsoft.Compute.CustomScriptExtension\1.10.8\RuntimeSettings
I found a file named “0”, which contained, amongst other things, the URL the script was download from and the command to execute. So be aware if you are working in a secure environment, or are using a public repository.