We often need to build testing, packaging or development environments in Azure. Often these are built in an ad-hoc way, manually. This is fine, if a little time consuming, but Azure makes it easy to create scripts that will automate the provisioning of these environments. In fact, automation should really be the preferred method of deployment as it ensures that environments can be deployed or re-deployed rapidly whilst maintaining build quality.
The script that I am going to describe here uses PowerShell Azure cmdlets to provide a very flexible method of deploying the Azure environment, and deploying as many fully configured VMs (desktops or servers) as you may need.
This script relies on the AZ PowerShell module, and this should be installed on any workstation prior to running the script by running the following command. The script uses functions, for code minimisation and to simplify code reuse.
Install-Module -Name Az
Azure Environment and Networking
All the variables required for the script are set at the beginning, and I have added comments in the script describing all of these. All output is sent to the console.
The ConfigureNetwork function creates a Virtual Network, a subnet and a Network Security Group (NSG) name. The NSG also has a rule enabled for RDP. You can add other rules if you need them. If you don’t need the networking configured simply comment out the ConfigureNetwork call later in the script.
function ConfigureNetwork {
    $virtualNetwork = New-AzVirtualNetwork -ResourceGroupName $RGName -Location $Location -Name $VNet -AddressPrefix 10.0.0.0/16
    $subnetConfig = Add-AzVirtualNetworkSubnetConfig -Name default -AddressPrefix 10.0.0.0/24 -VirtualNetwork $virtualNetwork

    $rule1 = New-AzNetworkSecurityRuleConfig -Name rdp-rule -Description "Allow RDP" -Access Allow -Protocol Tcp -Direction Inbound -Priority 100 -SourceAddressPrefix * -SourcePortRange * -DestinationAddressPrefix * -DestinationPortRange 3389
    $nsg = New-AzNetworkSecurityGroup -ResourceGroupName $RGName -Location $location -Name $NsgName -SecurityRules $rule1
        # $rule1, $rule2 etc
        If ($nsg.ProvisioningState -eq "Succeeded") {Write-Host "Network Security Group created successfully"}Else{Write-Host "*** Unable to create or configure Network Security Group! ***"}
    $Vnsc = Set-AzVirtualNetworkSubnetConfig -Name default -VirtualNetwork $virtualNetwork -AddressPrefix "10.0.1.0/24" -NetworkSecurityGroup $nsg
    $virtualNetwork | Set-AzVirtualNetwork >> null
        If ($virtualNetwork.ProvisioningState -eq "Succeeded") {Write-Host "Virtual Network created and associated with the Network Security Group successfully"}Else{Write-Host "*** Unable to create the Virtual Network, or associate it to the Network Security Group! ***"}
}
I wanted the script to support fully configured VMs, which can be configured using scripts and Azure’s Custom Script Extension functionality. This enables scripts to be run during, or after VM deployment. These scripts need storing somewhere, so I have included a CreateStorageAccount function.
function CreateStorageAccount {
    If ($StorAccRequired -eq $True)
        {
        $storageAccount = New-AzStorageAccount -ResourceGroupName $RGName -AccountName $StorAcc -Location uksouth -SkuName Standard_LRS
        $ctx = $storageAccount.Context
        $Container = New-AzStorageContainer -Name $ContainerName -Context $ctx -Permission Container
        If ($storageAccount.StorageAccountName -eq $StorAcc -and $Container.Name -eq $ContainerName) {Write-Host "Storage Account and container created successfully"}Else{Write-Host "*** Unable to create the Storage Account or container! ***"}
        #$BlobUpload = Set-AzStorageBlobContent -File $BlobFilePath -Container $ContainerName -Blob $Blob -Context $ctx
        Get-ChildItem -Path $ContainerScripts -File -Recurse | Set-AzStorageBlobContent -Container "data" -Context $ctx
        }
        Else
        {
            Write-Host "Creation of Storage Account and Storage Container not required"
        }
}
This function creates a Storage Account and a Container (for holding the scripts). It then copies all files found in the $ContainerScripts variable up to the Container. Again, if this functionality is not required (e.g. you are storing your scripts in GitHub) you can comment out the CreateStorageAccount call later in the script.
Creating the VM/s
To provide the correct details for the image, the available SKUs need to be listed. This is done with the following command (don’t forget to enter the location that you want to use when creating the resource, as availability varies between regions).
Get-AzVMImageSku -Location "uksouth" -PublisherName "MicrosoftWindowsServer" -Offer "WindowsServer"
To identify available Windows 10 SKUs, use this command.
Get-AzVMImageSku -Location "uksouth" -PublisherName "MicrosoftWindowsDesktop" -Offer "Windows-10"
From this data we can put together the image name to be used for the VM. For example, We want to deploy the latest 20h2 Windows 10 image, so we would use the following string for the ImageName parameter.
MicrosoftWindowsDesktop:Windows-10:20h2-ent:latest
The CreateVMp function creates the VM, sets the local Admin User and Password, and creates a Public IP address.
function CreateVMp($VMName) {
    $PublicIpAddressName = $VMName + "-ip"

    $Params = @{
    ResourceGroupName = $RGName
    Name = $VMName
    Size = $VmSize
    Location = $Location
    VirtualNetworkName = $VNet
    SubnetName = "default"
    SecurityGroupName = $NsgName
    PublicIpAddressName = $PublicIpAddressName
    ImageName = $VmImage
    Credential = $VMCred
    }

    $VMCreate = New-AzVm @Params
    If ($VMCreate.ProvisioningState -eq "Succeeded") {Write-Host "Virtual Machine $VMName created successfully"}Else{Write-Host "*** Unable to create Virtual Machine $VMName! ***"}
}
Configuring the VM/s
Configuring VMs is done by means of a script, run on the newly provisioned VM. Obviously, a script allows you to do anything that you want. In my example the script is run from the Storage Account but copies media from a GitHub location and then installs Orca. You can use the same technique to do pretty much anything that you need to.
The script is run using the Custom Script Extension functionality in Azure. The function, RunVMConfig, can be run against any Azure Windows VM, it does not have to have been created using this script.
function RunVMConfig($VMName, $BlobFilePath, $Blob) {

    $Params = @{
    ResourceGroupName = $RGName
    VMName = $VMName
    Location = $Location
    FileUri = $BlobFilePath
    Run = $Blob
    Name = "ConfigureVM"
    }

    $VMConfigure = Set-AzVMCustomScriptExtension @Params
    If ($VMConfigure.IsSuccessStatusCode -eq $True) {Write-Host "Virtual Machine $VMName configured successfully"}Else{Write-Host "*** Unable to configure Virtual Machine $VMName! ***"}
}
The script that will be run is taken from the Storage Account Container, but it will also accept the RAW path to a GitHub repository. You would then not need to create the Storage Account.
Script Main Body
The main body of the script is actually quite short, due to the use of functions. The Resource Group is created, and then the ConfigureNetwork and CreateStorageContainer functions are called (if required, they can be commented out).
# Main Script

# Create Resource Group
$RG = New-AzResourceGroup -Name $RGName -Location $Location
If ($RG.ResourceGroupName -eq $RGName) {Write-Host "Resource Group created successfully"}Else{Write-Host "*** Unable to create Resource Group! ***"}

# Create VNet, NSG and rules (Comment out if not required)
ConfigureNetwork

# Create Storage Account and copy media (Comment out if not required)
CreateStorageAccount

# Build VM/s
$Count = 1
While ($Count -le $NumberOfVMs)
    {
    Write-Host "Creating and configuring $Count of $NumberofVMs VMs"
    $VM = $VmNamePrefix + $VmNumberStart
    CreateVMp "$VM"
    RunVMConfig "$VM" "https://packagingstoracc.blob.core.windows.net/data/VMConfig.ps1" "VMConfig.ps1"
    # Shutdown VM if $VmShutdown is true
    If ($VmShutdown)
        {
        $Stopvm = Stop-AzVM -ResourceGroupName $RGName -Name $VM -Force
        If ($RG.ResourceGroupName -eq $RGName) {Write-Host "VM $VM shutdown successfully"}Else{Write-Host "*** Unable to shutdown VM $VM! ***"}
        }
    $Count++
    $VmNumberStart++
    }
In order to provision multiple VMs, a While loop is used, to rerun code until the required number of VMs are provisioned. The VM name is created by concatenating variables, and the name is passed, first to the CreateVMp function, and then to the RunVMConfig function. A variable at the beginning of the script is used to check if the newly provisioned VM should be shutdown or not. This is very useful as an aid to manage costs.
The full script is located here.
https://raw.githubusercontent.com/HigginsonConsultancy/Scripts/master/CreateConfigureVMs.ps1
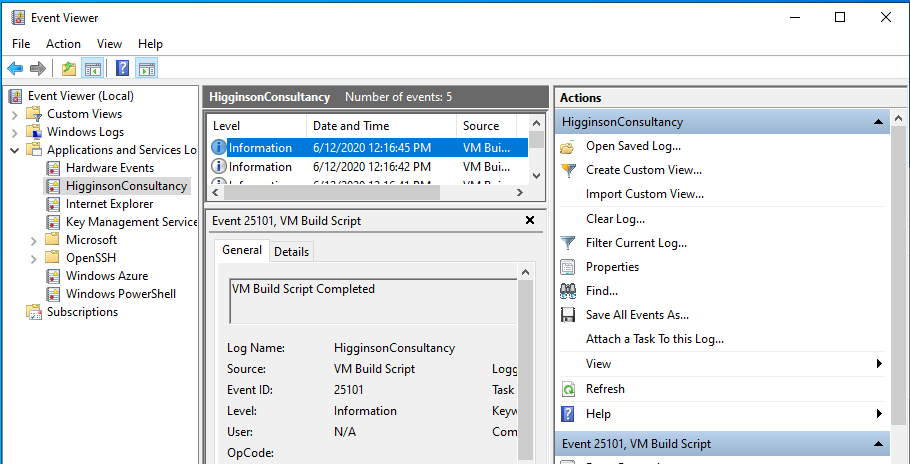
The VM config script I used is written to output into the Windows Event Log for ease of fault finding. It is located here.
https://raw.githubusercontent.com/HigginsonConsultancy/Scripts/master/VMConfig.ps1
The script outputs to the console and successful completion shouls look something like this.
Resource Group created successfully
Network Security Group created successfully
Virtual Network created and associated with the Network Security Group successfully
Storage Account and container created successfully
Account              SubscriptionName          TenantId                             Environment
-------              ----------------          --------                             -----------
graham@*********.*** Microsoft Partner Network ********-****-****-****-********73ab AzureCloud

ICloudBlob                         : Microsoft.Azure.Storage.Blob.CloudBlockBlob
BlobType                           : BlockBlob
Length                             : 2034
IsDeleted                          : False
BlobClient                         : Azure.Storage.Blobs.BlobClient
BlobProperties                     : Azure.Storage.Blobs.Models.BlobProperties
RemainingDaysBeforePermanentDelete :
ContentType                        : application/octet-stream
LastModified                       : 11/30/2020 10:03:49 AM +00:00
SnapshotTime                       :
ContinuationToken                  :
Context                            : Microsoft.WindowsAzure.Commands.Storage.AzureStorageContext
Name                               : VMConfig.ps1

Creating and configuring 1 of 1 VMs
Virtual Machine PVMMSI500 created successfully
Virtual Machine PVMMSI500 configured successfully
VM PVMMSI500 shutdown successfully